Quite long time passed, since my last update. I hope that this post will successfully fill the resulting gap and you will find reading it worthwhile.
TOC:
1. A little bit too long of a foreword...
When I first met Mule there was that thing, that made me feel a little bit discouraged. There was only residual information about best practices on how to develop Mule applications and even less advice on how to effectively test them. All Mule examples provided here and there on the Internet are presented in a deploy-click-check if works manner. Next thing is that all demos are mostly simple, one-flow applications. Question about how to cope with larger, complex configurations was left unanswered.
I'll try to shed some light on those subjects. For starters, there is some great writing by Ryan Hoegg available at Confluex blog. I'll try to elaborate more on some topics brought up by Ryan, but focusing mainly on testing part using MUnit framework.
When talking about testing in Mule environment it is worth to emphasize that two types of tests exist here. Following the Mule documentation naming convention, first type are unit tests, which cover your self-written message processors (transformers, components etc.) Mule's current testing capabilities are more than enough to handle those cases pretty well. In terms of testing Groovy script components here is something I wrote previously.
The other are functional tests - our main point of interest for this blog post.
I'd like to call them flow tests. Scope of these kinds of tests are pretty wide. How you approach them is up to you. You can test any given part of your application (depending on how you designed and structured your flows):
Obviously, the best is to have mix of those, excluding the latter from your automated build test suite. We don't want to call actual, external services each build, do we? Here is an idea of how you can separate them.
For all that MUnit comes in handy...
2. MUnit introduction
MUnit is a next generation Mule testing framework. It is still under development, but its current state (3.4-M5) is more than enough to persuade me to use it in my work projects. In fact, I'm using it since the first day I discovered it, as the current testing framework lacks flexibility in my opinion.
Plenty of MUnit features are not easily available to the current, official version (i.e. mocking flows and outbound endpoints is cumbersome and requires a lot of effort). What's more, MUnit comes in two flavours:
One thing needs mentioning. This blog post is strictly Java-centric, I won't tell you anything about the XML way of writing MUnit tests. If that was not what you were looking for, I'm sorry to disappoint you.
The reason is simple - I'm not a fan of XML and the Java approach suits me much better. Nevertheless, everything MUnit can do with XML is possible using Java (and the other way round). That's, at least, what specification states :) (I haven't checked that).
MUnit is getting more recognizable lately (eventually it ought to replace current testing framework). Latest Mule (3.5 Early Access version) starts integrating MUnit with Studio heavily. More information about MUnit capabilities is available at project's wiki page, but I'll try to cover most of its powers here.
3. Think about your flow design
I'll try to outline some guidelines I now follow. They emerged from my ~year Mule integration experience. Note: I can't guarantee they will solve all your problems nor they will fit each of possible use cases. I'm just saying that they helped me survive some of the bad times I had. What's even more important, I'm not even sure if they are the best I can get from my cooperation with Mule and Studio. If you have your own practices, questions, suggestions I'd like to hear them!
In the beginning I want to emphasize that Mule's code it's even easier to get messy with than with Java (at least for me). Hence, having good test coverage is crucial. How you design your flows implies the ease of testing them. What's more, I really recommend to start your work flow in a TDD manner and let you flow design be guided by tests. From my experience, I can say, it pays off greatly later on.
Keep your flows short, make sure that each flow follows single responsibility principle. For complex solution split your configuration file (.xmls containing flows) into smaller ones. Think in functionality and business logic terms. I'm used to having one configuration file with main flow (with source component) controlling the whole process and others implementing bigger chunks of business logic (i.e. sending attachments with gathered information, fulfilling customer data) Of course each of these configuration files can contain many flows / subflows. Mule by mule-deploy.properties file (config.resources attribute) knows, which files comprise whole application set-up.
Let's say we have a requirement to expose a service via HTTP endpoint, which needs to perform some complex validation logic (on HTTP Headers, Request Body etc.), then transform the provided data into a proprietary structure, backing it up with data coming from external REST Service. Eventually send a notification email to anyone who it may concern.
Example configuration can look like this:

This main flow can accommodate whole application process into few single flow references, which can be easily read and understood. Every of the bigger, complex tasks was extracted to a different configuration file. With such structure we can execute end-to-end tests or test only main processing paths of full solution (when flow has choice components as presented) by mocking out all referenced implementations. To not litter the main flow, we extracted variables initialization part to a subflow. Those variables can be then used in processing data or sending email part.
b) validate-request.xml, process-customer-data.xml, send-email-notification.xml:
Each of that configuration files is responsible for different phase of the solution. We can do the same with them if the flows would get bigger: split into more compact flows / subflows or even into another configuration files if necessary.
At some point in time, you may come up with the idea, that part of application should be extracted as separate Mule application. Keeping your flows modularized, makes this task relatively easy.
What's also important (and it's our subject) is that it allows us to test parts of the application in isolation. With MUnit you don't need to have an inbound endpoint to call your flow. In fact, in MUnit you can access any flow directly (it disables all inbounds by default). You can test validation part by running your test against ValidateHTTPRequest flow or check if all variables were initialized properly by calling InitializeVariables subflow from within MUnit test.
Lastly, a word about flow 'packaging'. Unfortunately Studio can't accept the fact that I'd like to have my config files structured in subdirectories. The only appropriate place for them, according to Studio, is src/main/app. Whenever you try to put a flow config into a subfolder, Studio recreates it in 'root' directory..
4. Test constants
You will be using variables in your tests. A lot! Flow names, variable names, configuration files to name a few. Keeping those names as interface constants gives you two advantages:
1. When renaming any variable, you don't have to go through all tests and correct one by one - just rename once in the interface.
2. When you enable your interface class for static imports in Mule Studio, you can type those values in no-time using code completion assistance:

5. Assertions
To make sure that flows behave in the way we expect them to, there are two objects we are most interested in checking: MuleEvent and MuleMessage. These two are main targets for assertion expressions. MuleEvent is a basic entity which MUnit test returns as a result. it contains MuleMessage, attachments and session data.
I'm a big fan of fluent assertions, hence I strongly recommend giving them a try. AssertJ is the framework to look at. It's a successor of Fest Assert. Constantly under development, has plenty of contributors with a thriving community. Most valuable benefit of using AssertJ is the great number of assertion types and direct support from your IDE (code completion).
To ease work with Mule stuff, I've created small extension for AssertJ. It is available at my GitHub, here. Right now it's an early version, bound together with something I call property enricher (I'll cover that later on). It covers presence of Mule Message properties (of different scopes), payload checks etc. Not everything's included, but most common cases I encountered in my projects.
It's not available in any public repository (yet?). You can build it yourself or get jar and sources from here, then install them into your local maven repository manually (or preferably into your artefact repository). Then you follow these instructions, common for every other AssertJ extension:
1. Add the library to your project
2. Enable pl.poznachowski.mule.message.assertions.Assertions for static imports
3. Start using:
a)


I think there is no need to go into details about available assertions. You can explore them on your own. Just one note here: When making assertions on MuleEvent object, make sure you 'traverse down' to asserting MuleMessage using hasMuleMessageWhich() method as the last check for MuleEvent, as you won't be able to go back to it in the same assertion statement.
6. MUnit test structure
MUnit test does not differ much than the previous functional Mule test. Simplest example is presented below:
As you can see, it's an ordinary JUnit test extending FunctionalMunitSuite class.
There are two thing we need to do in our test:
Of course, to make our test sensible, we need to assert whether the expected result is equal to what the flow actually produced as an output.
MUnit, by default, scans your mule-deploy.properties file and load all configuration files it can find there to perform the test. It's rarely the case we'd like to have (except end-to-end testing). Main reason for avoiding that, is speed. We our tests to perform as fast as possible and there is no reason to include whole configuration when we are testing (i.e.) validation logic only. To accomplish that we need to override getConfigResources() method and provide configuration files, which should participate in a test:
This method accepts String value with comma separated config file names. To produce such String I use Guava's Joiner class. All configuration files names should, of course :), be set up as interface constants (i.e. MAIN_FLOW_CFG = "main-flow.xml")
Another thing we need to know about MUnit is, that all inbound endpoints are skipped by default, meaning the process begin just right after when it would be intercepted by the source endpoint. However, it is still possible to use an inbound entry point for accessing flow in a test. There are two ways to achieve that:
When working with custom connectors and mocking them out is not a desired behavior, there is a method you can use: haveToMockMuleConnectors(). In that case, we want to override it and return false.
In terms of packaging, I'm used to keeping my Mule tests in packages named after flow names (then subpackage them if necessary), i.e. pl.poznachowski.munit.example.mainflow
7. Property enricher
Properties are most widely used features of Mule. Hence, it won't be uncommon to test part of application with MuleMessage already containing some Mule properties or to mock a message processor to modify them (alter / create / remove).
When creating MuleEvent for testing purposes you only can set payload using provided testEvent() method. To make working with properties easier I've introduced something I call property enricher. You can fluently apply any kind of property on either MuleEvent object or MuleMessage:
If you'd like to give it a try, it's a part of the same utility project I described before - available here.
8. Execution environments
I think it is always a good idea to parametrize any properties eligible to change between execution environments. This has been well explained in the Confluex blog post. Having prepared beforehand property files for each environment and then not to worry about it during deployment is something I really appreciate. But what if we want to make our flow behave differently between environments? It is also possible due to spring:import capability. Let me show you an example how we can roll it out.
Let's say that we are exposing a flow through a HTTP/HTTPS endpoint. For functional testing we want to use standard HTTP, but for pre-production (and production of course) we need to work with HTTPS.
To accomplish that, instead of having our endpoint 'hardcoded' in the flow, we'll use flow reference:

and set up spring import in the .xml config file:
You shouldn't care about Studio throwing errors. It is not a rare case, that Studio is complaining about something, which is perfectly ok for Mule ESB itself.TOC:
1. A little bit too long of a foreword...
2. MUnit introduction
3. Think about your flow design
4. Test constants
5. Assertions
6. MUnit test structure
7. Property enricher
8. Execution environments
9. Mocking
10. Implementing mocked services
11. Verifying & spying
12. Summary
munit-utils@github
munit-utils-0.0.1.zip
2. MUnit introduction
3. Think about your flow design
4. Test constants
5. Assertions
6. MUnit test structure
7. Property enricher
8. Execution environments
9. Mocking
10. Implementing mocked services
11. Verifying & spying
12. Summary
munit-utils@github
munit-utils-0.0.1.zip
1. A little bit too long of a foreword...
When I first met Mule there was that thing, that made me feel a little bit discouraged. There was only residual information about best practices on how to develop Mule applications and even less advice on how to effectively test them. All Mule examples provided here and there on the Internet are presented in a deploy-click-check if works manner. Next thing is that all demos are mostly simple, one-flow applications. Question about how to cope with larger, complex configurations was left unanswered.
I'll try to shed some light on those subjects. For starters, there is some great writing by Ryan Hoegg available at Confluex blog. I'll try to elaborate more on some topics brought up by Ryan, but focusing mainly on testing part using MUnit framework.
When talking about testing in Mule environment it is worth to emphasize that two types of tests exist here. Following the Mule documentation naming convention, first type are unit tests, which cover your self-written message processors (transformers, components etc.) Mule's current testing capabilities are more than enough to handle those cases pretty well. In terms of testing Groovy script components here is something I wrote previously.
The other are functional tests - our main point of interest for this blog post.
I'd like to call them flow tests. Scope of these kinds of tests are pretty wide. How you approach them is up to you. You can test any given part of your application (depending on how you designed and structured your flows):
- From testing integration between two adjacent message processors
- via business logic branches (capable of having mocked out any part of the process - external service calls, connections to DB, sending MQ messages etc.)
- to full system testing with all external services calls on board.
Obviously, the best is to have mix of those, excluding the latter from your automated build test suite. We don't want to call actual, external services each build, do we? Here is an idea of how you can separate them.
For all that MUnit comes in handy...
2. MUnit introduction
MUnit is a next generation Mule testing framework. It is still under development, but its current state (3.4-M5) is more than enough to persuade me to use it in my work projects. In fact, I'm using it since the first day I discovered it, as the current testing framework lacks flexibility in my opinion.
Plenty of MUnit features are not easily available to the current, official version (i.e. mocking flows and outbound endpoints is cumbersome and requires a lot of effort). What's more, MUnit comes in two flavours:
- Well-known Java approach, where you write your tests as you would normally do (via JUnit).
- Mule XML code with MUnit schema.
One thing needs mentioning. This blog post is strictly Java-centric, I won't tell you anything about the XML way of writing MUnit tests. If that was not what you were looking for, I'm sorry to disappoint you.
The reason is simple - I'm not a fan of XML and the Java approach suits me much better. Nevertheless, everything MUnit can do with XML is possible using Java (and the other way round). That's, at least, what specification states :) (I haven't checked that).
MUnit is getting more recognizable lately (eventually it ought to replace current testing framework). Latest Mule (3.5 Early Access version) starts integrating MUnit with Studio heavily. More information about MUnit capabilities is available at project's wiki page, but I'll try to cover most of its powers here.
3. Think about your flow design
I'll try to outline some guidelines I now follow. They emerged from my ~year Mule integration experience. Note: I can't guarantee they will solve all your problems nor they will fit each of possible use cases. I'm just saying that they helped me survive some of the bad times I had. What's even more important, I'm not even sure if they are the best I can get from my cooperation with Mule and Studio. If you have your own practices, questions, suggestions I'd like to hear them!
In the beginning I want to emphasize that Mule's code it's even easier to get messy with than with Java (at least for me). Hence, having good test coverage is crucial. How you design your flows implies the ease of testing them. What's more, I really recommend to start your work flow in a TDD manner and let you flow design be guided by tests. From my experience, I can say, it pays off greatly later on.
Keep your flows short, make sure that each flow follows single responsibility principle. For complex solution split your configuration file (.xmls containing flows) into smaller ones. Think in functionality and business logic terms. I'm used to having one configuration file with main flow (with source component) controlling the whole process and others implementing bigger chunks of business logic (i.e. sending attachments with gathered information, fulfilling customer data) Of course each of these configuration files can contain many flows / subflows. Mule by mule-deploy.properties file (config.resources attribute) knows, which files comprise whole application set-up.
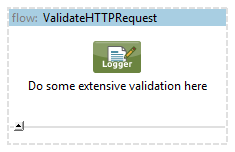
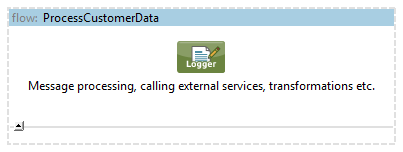
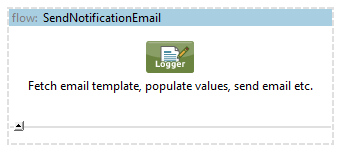
Let's say we have a requirement to expose a service via HTTP endpoint, which needs to perform some complex validation logic (on HTTP Headers, Request Body etc.), then transform the provided data into a proprietary structure, backing it up with data coming from external REST Service. Eventually send a notification email to anyone who it may concern.
Example configuration can look like this:
a) main-flow.xml:
This main flow can accommodate whole application process into few single flow references, which can be easily read and understood. Every of the bigger, complex tasks was extracted to a different configuration file. With such structure we can execute end-to-end tests or test only main processing paths of full solution (when flow has choice components as presented) by mocking out all referenced implementations. To not litter the main flow, we extracted variables initialization part to a subflow. Those variables can be then used in processing data or sending email part.
b) validate-request.xml, process-customer-data.xml, send-email-notification.xml:
Each of that configuration files is responsible for different phase of the solution. We can do the same with them if the flows would get bigger: split into more compact flows / subflows or even into another configuration files if necessary.
At some point in time, you may come up with the idea, that part of application should be extracted as separate Mule application. Keeping your flows modularized, makes this task relatively easy.
What's also important (and it's our subject) is that it allows us to test parts of the application in isolation. With MUnit you don't need to have an inbound endpoint to call your flow. In fact, in MUnit you can access any flow directly (it disables all inbounds by default). You can test validation part by running your test against ValidateHTTPRequest flow or check if all variables were initialized properly by calling InitializeVariables subflow from within MUnit test.
Lastly, a word about flow 'packaging'. Unfortunately Studio can't accept the fact that I'd like to have my config files structured in subdirectories. The only appropriate place for them, according to Studio, is src/main/app. Whenever you try to put a flow config into a subfolder, Studio recreates it in 'root' directory..
4. Test constants
You will be using variables in your tests. A lot! Flow names, variable names, configuration files to name a few. Keeping those names as interface constants gives you two advantages:
1. When renaming any variable, you don't have to go through all tests and correct one by one - just rename once in the interface.
2. When you enable your interface class for static imports in Mule Studio, you can type those values in no-time using code completion assistance:
5. Assertions
To make sure that flows behave in the way we expect them to, there are two objects we are most interested in checking: MuleEvent and MuleMessage. These two are main targets for assertion expressions. MuleEvent is a basic entity which MUnit test returns as a result. it contains MuleMessage, attachments and session data.
I'm a big fan of fluent assertions, hence I strongly recommend giving them a try. AssertJ is the framework to look at. It's a successor of Fest Assert. Constantly under development, has plenty of contributors with a thriving community. Most valuable benefit of using AssertJ is the great number of assertion types and direct support from your IDE (code completion).
To ease work with Mule stuff, I've created small extension for AssertJ. It is available at my GitHub, here. Right now it's an early version, bound together with something I call property enricher (I'll cover that later on). It covers presence of Mule Message properties (of different scopes), payload checks etc. Not everything's included, but most common cases I encountered in my projects.
It's not available in any public repository (yet?). You can build it yourself or get jar and sources from here, then install them into your local maven repository manually (or preferably into your artefact repository). Then you follow these instructions, common for every other AssertJ extension:
1. Add the library to your project
2. Enable pl.poznachowski.mule.message.assertions.Assertions for static imports
3. Start using:
a)
b)
I think there is no need to go into details about available assertions. You can explore them on your own. Just one note here: When making assertions on MuleEvent object, make sure you 'traverse down' to asserting MuleMessage using hasMuleMessageWhich() method as the last check for MuleEvent, as you won't be able to go back to it in the same assertion statement.
6. MUnit test structure
MUnit test does not differ much than the previous functional Mule test. Simplest example is presented below:
package pl.poznachowski.munitblogsamples;

import static pl.poznachowski.mule.message.assertions.Assertions.assertThat;
import static pl.poznachowski.munitblogsamples.TestConstants.VALIDATE_REQUEST_FLOW;

import org.junit.Test;
import org.mule.api.MuleEvent;
import org.mule.munit.runner.functional.FunctionalMunitSuite;

public class FirstMunitTest extends FunctionalMunitSuite {

 @Test
 public void simplestTest() throws Exception {
  MuleEvent result = runFlow(VALIDATE_REQUEST_FLOW, testEvent("payload"));

  assertThat(result)
   .hasMuleMessageWhich()
     .hasStringPayload("payload");
 }
}
As you can see, it's an ordinary JUnit test extending FunctionalMunitSuite class.
There are two thing we need to do in our test:
- Prepare MuleEvent object as an input to our flow. We can do that by using provided testEvent(Object payload) method.
- Execute runFlow(String flowName, MuleEvent event) method specifying flow name to test against and event we just created in the first step.
Of course, to make our test sensible, we need to assert whether the expected result is equal to what the flow actually produced as an output.
MUnit, by default, scans your mule-deploy.properties file and load all configuration files it can find there to perform the test. It's rarely the case we'd like to have (except end-to-end testing). Main reason for avoiding that, is speed. We our tests to perform as fast as possible and there is no reason to include whole configuration when we are testing (i.e.) validation logic only. To accomplish that we need to override getConfigResources() method and provide configuration files, which should participate in a test:
public class FirstMunitTest extends FunctionalMunitSuite {

 @Override
 protected String getConfigResources() {
  return Joiner.on(',').join(MAIN_FLOW_CFG, VALIDATE_REQUEST_CFG);
 }
This method accepts String value with comma separated config file names. To produce such String I use Guava's Joiner class. All configuration files names should, of course :), be set up as interface constants (i.e. MAIN_FLOW_CFG = "main-flow.xml")
Another thing we need to know about MUnit is, that all inbound endpoints are skipped by default, meaning the process begin just right after when it would be intercepted by the source endpoint. However, it is still possible to use an inbound entry point for accessing flow in a test. There are two ways to achieve that:
- Override haveToDisableInboundEndpoints() method and make it return false, or you can selectively pick flows which won't have inbound endpoints disabled by:
- Overriding getFlowsExcludedOfInboundDisabling() method and providing list of String values with flows to exclude.
MuleClient client = muleContext.getClient();and use the client instead of runFlow() method.
When working with custom connectors and mocking them out is not a desired behavior, there is a method you can use: haveToMockMuleConnectors(). In that case, we want to override it and return false.
In terms of packaging, I'm used to keeping my Mule tests in packages named after flow names (then subpackage them if necessary), i.e. pl.poznachowski.munit.example.mainflow
7. Property enricher
Properties are most widely used features of Mule. Hence, it won't be uncommon to test part of application with MuleMessage already containing some Mule properties or to mock a message processor to modify them (alter / create / remove).
When creating MuleEvent for testing purposes you only can set payload using provided testEvent() method. To make working with properties easier I've introduced something I call property enricher. You can fluently apply any kind of property on either MuleEvent object or MuleMessage:
 @Test
 public void simplestTest() throws Exception {

  MuleEvent testEvent = PropertyEnricher.enrich(testEvent("payload"))
       .withInvocationProperty(SOME_VARIABLE, true)
       .get();

  MuleEvent result = runFlow(VALIDATE_REQUEST_FLOW, testEvent);

  assertThat(result)
   .hasMuleMessageWhich()
   .hasStringPayload("payload")
   .hasInvocationProperty(SOME_VARIABLE).withValue(true);
 }
If you'd like to give it a try, it's a part of the same utility project I described before - available here.
8. Execution environments
I think it is always a good idea to parametrize any properties eligible to change between execution environments. This has been well explained in the Confluex blog post. Having prepared beforehand property files for each environment and then not to worry about it during deployment is something I really appreciate. But what if we want to make our flow behave differently between environments? It is also possible due to spring:import capability. Let me show you an example how we can roll it out.
Let's say that we are exposing a flow through a HTTP/HTTPS endpoint. For functional testing we want to use standard HTTP, but for pre-production (and production of course) we need to work with HTTPS.
To accomplish that, instead of having our endpoint 'hardcoded' in the flow, we'll use flow reference:
and set up spring import in the .xml config file:
 <spring:beans>
  <spring:import resource="classpath:my-endpoint-${connection.type}.xml" />
 </spring:beans>
Don't forget to have {connection.type} parameter set up in wrapper.conf of each of the Mule instances. Assume to expect only two possibilities here: secured / unsecured. Then we need to prepare two separate configuration files (located on the classpath): my-endpoint-secured.xml and my-endpoint-unsecured.xml and provide flow reference implementations (secured with HTTPS component, unsecured with HTTP). Remember about having same flow name as in the flow reference. After that, we're done. Mule instance will pick appropriate setup, basing on the connection.type parameter provided.
One last thing we would need to remember about in terms of testing such constructs. MUnit need to know which HTTP type to test with. We can provide it by adding a system property in the getConfigResources() method:
 @Override
 protected String getConfigResources() {
  System.setProperty("connection.type", "unsecured");
  return "main-flow.xml";
 }
Of course those Strings should be extracted to constants, as you would use them a lot.9. Mocking
It's time to talk about crucial element of flows testing. In the beginning we need to realize that every component in Mule is a message processor (endpoint, flow reference etc). That makes MUnit powerful tool, as it has the ability to mock any of such things. Lets decompose mock expression into two parts:
1. Defining mock target
You always starts your mock expression with whenMessageProcessor() fluent method. Required parameter is the processor name (XML tag name in Mule configuration file).
Then, if our processor is within a namespace we need to apply .ofNamespace() method to our mock.
Lastly, if there is more than one element with same name (i.e. flow, sub-flow, endpoints) we need to add .withAttributes() method, which takes Map<String,Object> or varargs Attribute as an argument. The latter is easy to create with a static helper structure available: attribute(String name).withValue(Object value)
2. Defining mock behaviour
When we're done with target declaration we need to specify how our mock should behave. There are a couple of options here:
.thenReturnSameEvent() - Means that message processor you mocked out will do nothing (outputs the same thing that came to the processor) during the flow processing.
.thenThrow(Throwable exception) - Mocked processor will throw specified exception.
.thenReturn(MuleMessage message) - This will return a MuleMessage object prepared beforehand. We can make use of available muleMessageWithPayload(Object payload) method to help ourselves here. Actually, I don't use thenReturn() method much, as it's not flexible enough. Especially when working with Mule properties and reusable flows.
.thenApply(MuleMessageTransformer transformer) - Most flexible method. Here we can prepare and use a Mule transformer, meaning we can do and return almost anything in our message (like quickly add properties using property enricher)
Example of flow mocking:
whenMessageProcessor("flow").withAttributes(attribute("name").withValue("ValidateHTTPRequest")).thenReturnSameEvent();
More examples can be seen here. (note the contains() part when mocking sub-flows)While it seems as a great and powerful feature, let me tell you when and why not to use mocking. Referring to our example we have a MainFlow which has several flow references. I want to mock out all those references, to make a simple test of the choice component, whether it routes properly (to send email or not). My first thought with that approach in mind, was to provide only main-flow.xml to my MUnit test (I want to have rest of flows mocked). Unfortunately, that's not possible. Mule needs to set up all flows during start up, meaning it will fail saying that flow couldn't be found. To overcome that, we would still need to provide all flow constructs (despite mocking), which implies greatly increased Mule start up time. (referenced flows can be complex, compound of even more flows / subflows). Not to mention configuration hassle (did I included all required flows?).
Of course we want our tests to perform as quick as possible. Solution for that is the way I was mocking flows before MUnit era. You need to create simple testing mock flows (with same flow names as in production code) and provide them in getConfigResources() method instead of the originals (src/test/resources is a great place to store them), but be careful! When you work with test flows, don't use Mule Config Flow Editor. Otherwise, you would end up with duplicated tests flows in src/main/app folder. There's a JIRA ticket for that. It now says it has been resolved in 3.5 Dolomite version. Not sure about the code names... but in my current Mule Studio (Version: 3.5.0 Build Id: 201402101410) it is still not working properly.
10. Implementing mocked services
It may sometimes be useful to simulate some more complex behavior of an external service in a form of a Mule mocked service implementation. We can accomplish that by combining everything we covered so far.
First thing would be to make sure that service outbound address parameters are externalized to a properties file and that property file is made environment specific (via system property - refer to earlier mentioned Confluex blog post). Then we need to code actual mock implementation in a test flow (address parameters can be any). We also need to create property file with mock service address (as it would be an another environment configuration set up).
To wrap everything together we need to set system property (in getConfigResources()) to a value we are using in a property file indicating mocked service address. Remember also of adding this mocked service flow to a collection of flows, which shouldn't have their inbound endpoints disabled. Otherwise, your mocked service won't be accessible at all.
I know that MUnit also offers FTP, Mail and DB servers that you can spawn on the fly in your tests. However, I didn't try them out yet, so it's better you check MUnit wiki page for more information on that.
11. Verifying & spying
There two other MUnit features worth mentioning:
Veryfing is a way to assert whether a message processor has been called during test execution. Its semantic is very similar to mocking. Instead of whenMessageProcessor() method we need to use verifyCallOfMessageProcessor() providing processor name with its identification details (if necessary: ofNamespace(), withAttributes()) and then using available assertion methods: .atLeastOnce(), .atLeast(), .atMost(). Names are self-explanatory. With atLeast() and atMost() you need to provide integer value to make those assertions sensible.
Example validating that send email flow was called at least 2 times:
verifyCallOfMessageProcessor(FLOW).withAttributes(attribute(NAME).withValue("SendNotificationEmail")).atLeast(2);
Spying can be used to validate assumptions before any given message processor starts processing or just right after. Again you start the same as with verifying and mocking, but with spyMessageProcessor() method. When the target is acquired you can use .before() and .after() method passing any number of SpyProcess instances as an argument.
SpyProcess is an interface with one method signature: void spy(MuleEvent event). In that method implementation you can perform your assertions and check the payload in before or after phase.
Example checking variable presence and value, before and after using set-variable component:
spyMessageProcessor("set-variable").withAttributes(attribute("variableName").withValue("text"))
  .before(new SpyProcess() {
   @Override
   public void spy(MuleEvent beforeEvent) throws MuleException {
    assertThat(beforeEvent)
     .hasMuleMessageWhich()
      .hasInvocationProperty("text").notSet();
   }
  })
  .after(new SpyProcess() {
   @Override
   public void spy(MuleEvent afterEvent) throws MuleException {
    assertThat(afterEvent)
     .hasMuleMessageWhich()
      .hasInvocationProperty("text").withValue("hello");
   }
  });
12. Summary
That would be about everything I could come up with. If you have any questions, suggestions please let me know. Lastly, two 'pro' :) tips:
- do not commit any .flow files (they are required for Studio only, and are being generated from corresponding .xml)
- good log4j configuration can save you a lot of time and trouble!